 Emergency Preparedness and Response
Sample Emergency Plan: Building(s) Stabilization and Salvage
Building(s) Stabilization and Salvage
[Insert institution's name] Emergency Response: "Responding to Water and Fire Emergencies that Endanger [Insert institution's name] Collections"
- Call to Report the Problem
If fire – pull alarm. Call 911. Evacuate the area/building immediately along directed exit routes and notify appropriate authorities of exact location of incident.
Part A
Call Main Office of Facilities
SAFETY FIRST! Wait for a mechanical engineer from Facilities Office to check the flooded area. DO NOT ATTEMPT TO MOVE OR DISCONNECT WET COMPUTERS OR OTHER WET ELECTRICAL EQUIPMENT.
Do not attempt to do any emergency response or recovery work where there is any risk of electric shock. If there is any chance that water might come into contact with electricity, immediately contact Facilities Office at [Insert the telephone number of facilities office] and ask them to send someone to check and turn off power if necessary.
DO NOT HANDLE BOOKS OR CULTURAL HERITAGE MATERIALS THAT HAVE ANY SIGNS OF ACTIVE MOLD GROWTH. If active (moist, slimy, fuzzy) mold growth is evident, contact [Insert institution's division of occupational health and safety]
Call Institution Administration or Facilities Office
If no one answers, leave a message and call until you contact ONE of the following:
| STAFF | WORK | HOME | CELL / OTHER |
|---|---|---|---|
| Facilities Management | |||
| Director of Institution | |||
| Assistant Facilities Management |
Part B
Call the relevant institution staff or Preservation Department if you have one.
If no one answers, leave a message and call until you contact ONE of the following:
| STAFF | WORK | HOME | CELL / OTHER |
|---|---|---|---|
| Director, Emergency Response | |||
| Head of Collections Management Unit or Curators | |||
| Director of Preservation | |||
| Back-up | |||
| Back-up |
Part C
After institution business hours and on weekends, call the [Insert institution's] Collections Emergency Response cell phone: [Insert cell number(s)]
[Insert institution's staff responsible for Emergency Response into the paragraph below:]
[Head of Emergency Response] will consult with [Director of Institution and Facilities Management] to evaluate the situation. [Head of Emergency Response] will contact [Insert institution]. Administration and other staff as needed to determine if additional action needs to be taken, or if there is any need for assistance from additional [Insert institution] staff. Response teams and/or conservators with knowledge of specific collections or media will be contacted as needed.
II. Check the Floor Plans
Report the Exact Location of the Problem
- Identify the specific location on the floor plans if possible.
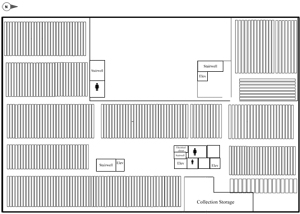
Suggested idea: Place the floor plans on [Insert institution's] Intranet and offsite. (Staff can keep copies in their homes or in the trunks of their cars.) - There are transparencies and paper copies of the Floor Plans in the Emergency Response Supplies. One copy is kept [Insert location at institution]; another is kept [Insert location at institution].
- Emergency supplies are located [Insert location at institution], which is marked on the floor plans. Keys for supplies are located [Insert location at institution].
Check storage areas above and below the floor where the leak is detected.
- Determine which areas are directly above and below the area where the leak occurs by using the transparencies to overlap the floor plans. Check these areas and be alert for any signs or sounds of water. Check ceiling tiles for signs of moisture.
- As described in Section V. Remove Standing Water use plastic sheeting to protect collection materials in adjacent areas where water might leak down to the floor below. Be sure to check all floors below the affected area.
III. Divert Ceiling Leaks
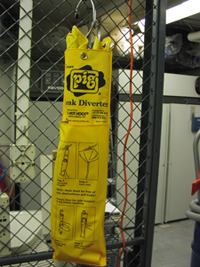
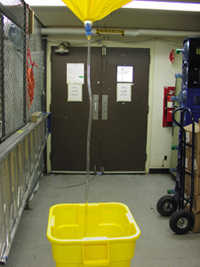
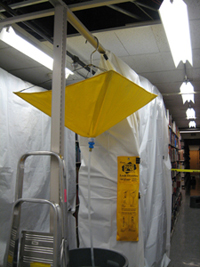
Ceiling leak diverters can be used to channel water dripping from the ceiling into a container:
- Do not hang the diverter from a fire sprinkler head!
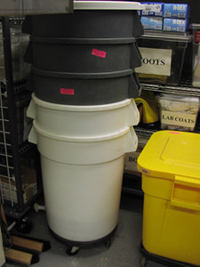
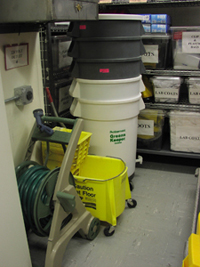
- Use plastic trash containers with wheeled bases to contain the water.
- Monitor the rate of drainage. When a trash container is over half full, replace it with a second container and empty out the first. Empty the container outside of the building.
- Do not leave containers that have any amount of water inside in the affected area. Ambient moisture from any source will contribute to an increase in humidity.
IV. Protect Collection Materials with Plastic Sheeting
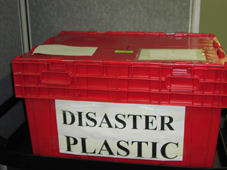
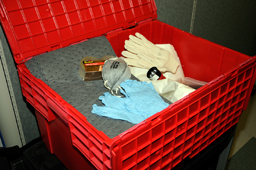
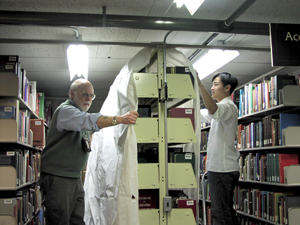
Plastic sheeting to be used for protecting the collection is stored in designated emergency supply areas. Metal clips are included with all supplies of plastic. These are used to attach plastic to shelving and clamp ends of plastic sheeting together.
- Store emergency supplies on every floor.
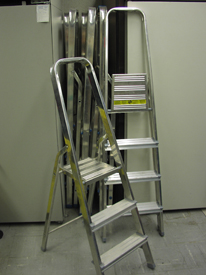
- Use ladders to drape the plastic, stored on each floor.
- To avoid the risk of slipping, position the ladder on matting so that it won't move and be sure shoes are dry before stepping onto the ladder. If necessary, put down absorbent matting and dry shoes first.
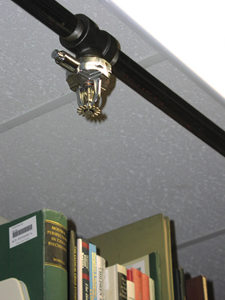
- Be careful not to come into contact with fire sprinkler heads when installing plastic!
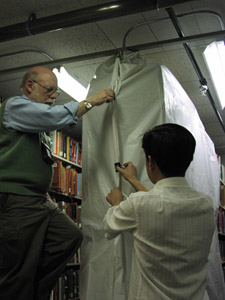
- Work in teams of two to unfold and drape plastic over the ranges that have water dripping on them or that are at risk of getting wet, making sure all areas are covered from the aisle floor, up and over the range, and back down to the next aisle floor. Two persons and two ladders are needed to hang plastic.
- Once opened, the sheets of plastic should overlap a few inches and be secured with metal clips, so that water cannot seep through the overlap. Depending on the magnitude of the emergency, the first priority is to cover all shelves with plastic sheets and attach metal clips so the water cannot seep through any of the overlaps.
- As an additional protective measure, drape plastic over at least one or two ranges on either side of the area where water is leaking onto collection materials.
- Print the words “WET MATERIALS” on a sheet of white paper and attach it to an end clip so that it is clearly visible. Record the numbers of the ranges and report them to the Preservation Professional in charge of the salvage operation.
- Do not remove wet materials from the shelves at the same time that plastic is being draped over adjacent ranges. Protecting the collection is the first phase. Recovery is phase two. It is better not to have two operations collide in the narrow stack aisles.
- After the plastic sheeting has been deployed, be sure to report the call numbers of all ranges involved in the emergency. Let the Preservation Professional in charge of the recovery operation know which ranges have wet books and which have only been draped with plastic as a protective measure. The Preservation Professional will need to alert other librarians and contractors and tell response teams where to begin recovery.
- Check ceiling areas on either side of affected ranges to determine whether additional ranges should be covered. Continue to check the ceiling tiles and the floor of the emergency area at regular intervals after the leak has been stopped. Cover additional ranges with plastic if new signs of water penetration are reported.
To prevent mold growth, make sure that plastic is removed within 24 hours. If this is not possible (e.g. because extensive repair work needs to be done in a emergency area), unclip some of the overlapping plastic, roll it up and place it on top of the shelves during business hours when repair crews are not on site.
DO NOT HANDLE BOOKS THAT HAVE ANY SIGNS OF ACTIVE MOLD GROWTH. If active (moist, slimy, fuzzy) mold growth is evident, contact a local local mold expert (Mycologist).
V. Remove Standing Water
- [Insert Facilities Officer] will request that Housekeeping staff remove water for all types of emergencies. However, before Housekeeping arrives, or in the event there is a major emergency, [Insert institution] staff should assist with the removal of water.
- Use red or yellow plastic caution tape to prevent anyone who is not working on the emergency response from entering area. Tape and other warning materials are located in [Insert location of institution's emergency supplies area]
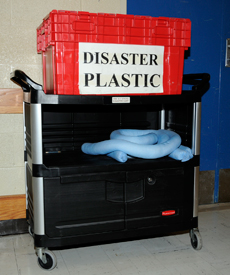
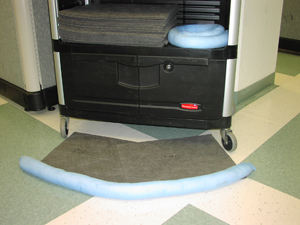
- Lay down absorbent matting to soak up water in aisles and corridors and reduce the risk of slipping and falling on the wet floor. Use absorbent "socks" to prevent water from spreading under shelving. Matting and absorbent socks are located [Insert location of institution's emergency supplies area]
- Additional absorbent matting can be found in [Insert location at Institution]
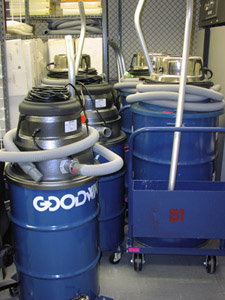
Location and Use of Water Vacuums (“wet vacs”):
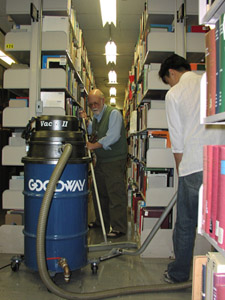
- Use wet vacs to remove water. Each wet vac comes equipped with tubing, a hose, a suction wand, and an extension cord. Always be careful not to plug in and turn on a machine into electrical outlets that are wet or near any water. See below for instructions on how to operate wet vacs.
- Wet vacs are located [Insert location at institution]. Wet vacs complete with all attachment tools (i.e., hoses) can be taken to any stack floor for use. Wet vacs should be emptied outside of the building.
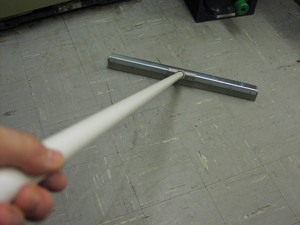
- [Insert instructions for the operation of institution's wet vacs, as seen in the following example paragraph:] To operate a wet vacuum, make sure the vacuum top unit clips are locked in place, securing the unit to the drum. Each wet vacuum cart is equipped with a vacuum hose. To attach the hose to the top unit, unscrew the wing nut until you can insert the hose end into the unit. Tighten the wing nut. Attach a metal suction end floor tool to the hose. Plug in the vacuum, making sure no water will come into contact with the electrical outlet. If necessary, use an extension cord. Flip the switch to start the machine, and use the vacuum as you would use a household vacuum cleaner, keeping the metal floor tool mouth flat against the floor so that the suction picks up the water.
- Work in teams with one team member using a squeegee to push water toward a water vacuum or mop.
- If there is water under shelving, remove books from the bottom shelves, then use a crowbar or large screwdriver, kept [Insert location at institution], to pry open and loosen the bottom shelves for removal.
- Use wet vacuums and absorbent toweling to remove water from under shelving. Keep the bottom shelves lifted up as much as possible and run squirrel cage floor fans in areas where water has penetrated until the floor is completely dry. See Section VI for information about the location and use of fans.
- Soak up water from shelves with absorbent toweling.
VI. Stabilize the Environment and Circulate Air
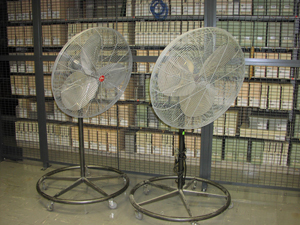
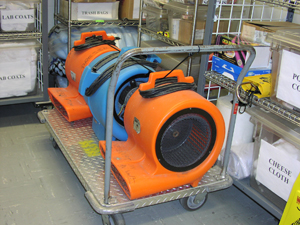
- Take large fans to emergency area, plug into electrical outlets that are not wet or near any water, and keep them running so air can circulate. Large floor fans are stored [Insert location at institution]. Lock the wheels of floor fans before they are powered on.
- Squirrel cage fans are stored in the [Insert location at Institution].
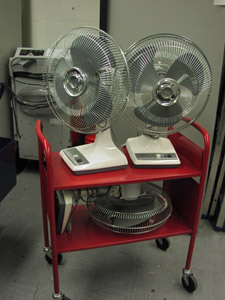
- There are [Insert quantity at institution] small rotating fans on a truck in the [Insert location at institution] that can also be used to facilitate drying.
- There are orange-colored extension cords kept [Insert location at institution] and in the large water vacuum carts.
- As a PRECAUTION, check to make sure fan switches are in the "off" position before plugging them in.
- Aim fans directly into the affected area, switch them on, and leave them running. Use common sense to direct the flow of air without disturbing other collection materials (e.g. paper files on a desk) that might be in the area.
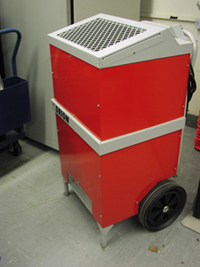
- In the event there is a large amount of water that will take a long time to remove, the use of a dehumidifier may be required in addition to the fans. There is a dehumidifier kept [Insert location at institution], which should only be set up by a emergency response team professional familiar with its operation. It requires the use of a plastic drain tube to siphon water removed into a container (e.g. rubber garbage can on wheels). If you are not sure how to operate the dehumidifier, ask someone from [Insert institution's Facilities Office] to set it up. Check electrical capacity for the affected area. Be careful not to overload electrical circuits.
- Remove wet towels and matting promptly once they have become saturated and replace with dry ones. Use rubber trash cans with wheels to transport used absorbent materials from the stacks to the outside dumpster.
- Plastic is temporarily placed over shelving when water is dripping from overhead. Remove plastic after dripping has stopped. Continue to circulate air through out the affected area and be sure to check materials underneath the plastic every few hours for evidence of possible mold or mildew growth. Promptly report any evidence of a mold or mildew outbreak to [Insert institution's Preservation/Conservation professional].
The information in this website is provided for educational purposes and intended only to convey best practices as they are currently known by NLM. NLM cannot be responsible for the success or failure of any technique or practice described or recommended in the website, and therefore expressly disclaims any liability.
Last Reviewed: August 18, 2014


