

Background
What is EC2?

EC2 instances are basically “remote computers”. Once created, you can use them just like your laptop to install/use software, perform analyses, and even manage other AWS services using the AWS CLI (more on this later).
Almost every aspect of an EC2 instance can be customized including the Operating System, hard drive type & size, available memory, and more. You can save a collection of options together into a template to use in future EC2 instances, or use preset templates provided by AWS.
The cost of an EC2 increases with larger hardware needs and longer runtimes.
- Today’s EC2 cost is roughly $0.20/hour/person
- Remember to turn it off when not in use!
What is MagicBLAST?

A “flavor” of BLAST which aligns next generation sequencing reads against traditional BLAST databases. As usual, you can use your own custom databases OR the NCBI-maintained ones (e.g., "nr").
Sequencing reads can be provided as local files like traditional BLAST, or they can be pulled remotely from SRA by providing an SRA accession number (this is what we will do today).
Documentation - https://ncbi.github.io/magicblast/
Additional Software we’ll need
- Samtools (http://www.htslib.org/doc/) used to convert MagicBLAST files into formats usable by NCBI’s Genome Data Viewer.
- Amazon Web Service Command Line Interface (https://docs.aws.amazon.com/cli/index.html) used to move data between EC2 and your S3 bucket.
Objective 2 Goals
Computational
- Create, customize, and manage an EC2 instance
- Run MagicBLAST and format output files with Samtools
- Upload files from your remote instance to your S3 bucket
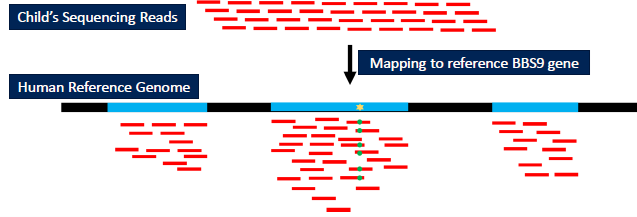
Case Study
- Align child’s DNA to human reference genome for compare against “expected” sequence
Launching an EC2 Instance
1) Use the search bar at the top of the console page to search for EC2 and click on the first result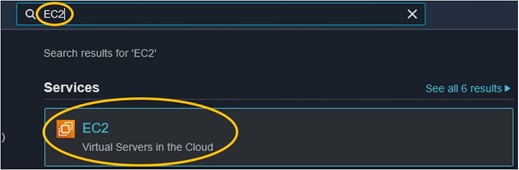
2) Scroll down a little and click the orange Launch Instance button and Launch Instance from its drop-down menu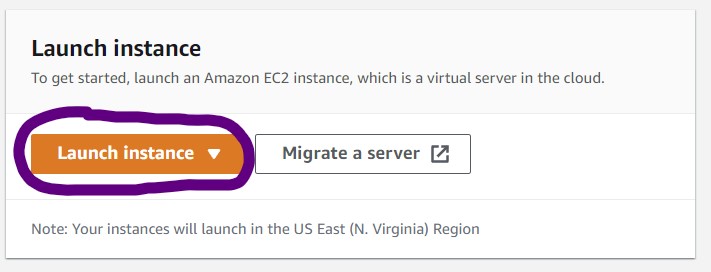
3) In the Name and Tags section, add a name for your EC2 instance. For the workshop, use the syntax "<username>-cloud-workshop" where <username> is the same name you logged in with.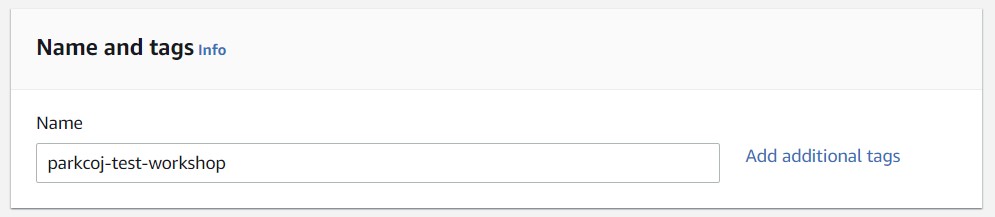
4) In the Application and OS Images section, select the Ubuntu box and select Ubuntu Server 20.04 from the drop-down menu.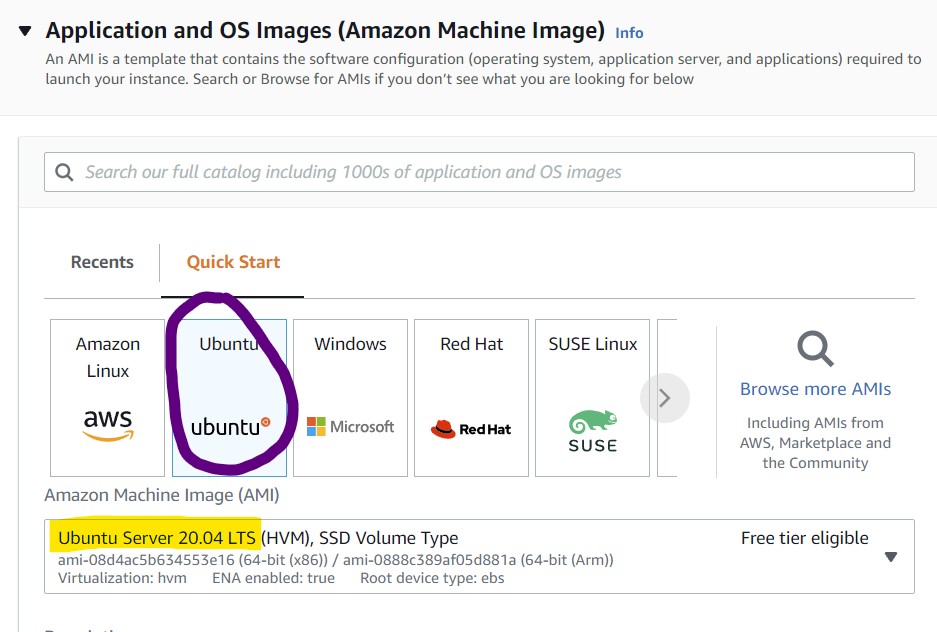
5) In the Instance Type section, click the drop-down menu and use the search bar to find m4.large and select it.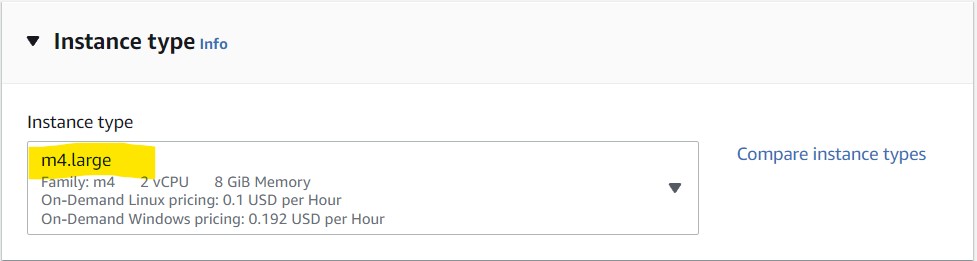
6) In the Key pair (login) section, select Proceed without a key pair (Not recommended) from the drop-down menu.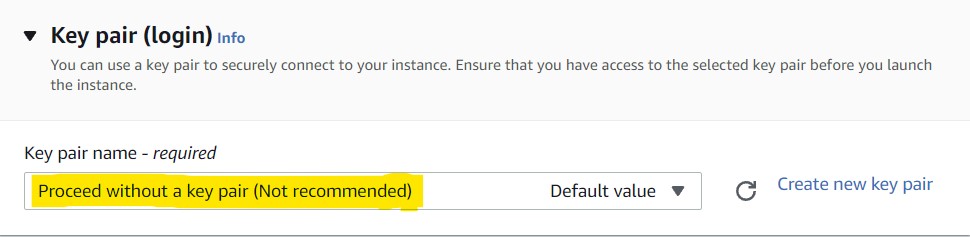
NOTE: Key pairs are used to access this remote computer using other methods, like SSH. We won’t be using these other methods so we can skip the key pairs here without affecting our ability to do the workshop. Additionally, by disabling the key pairs we also prevent public access to the instance. (This is how we will secure our instances for the workshop)
7) In the Network Settings section, choose "Select existing security group" then choose "default" from the drop down menu.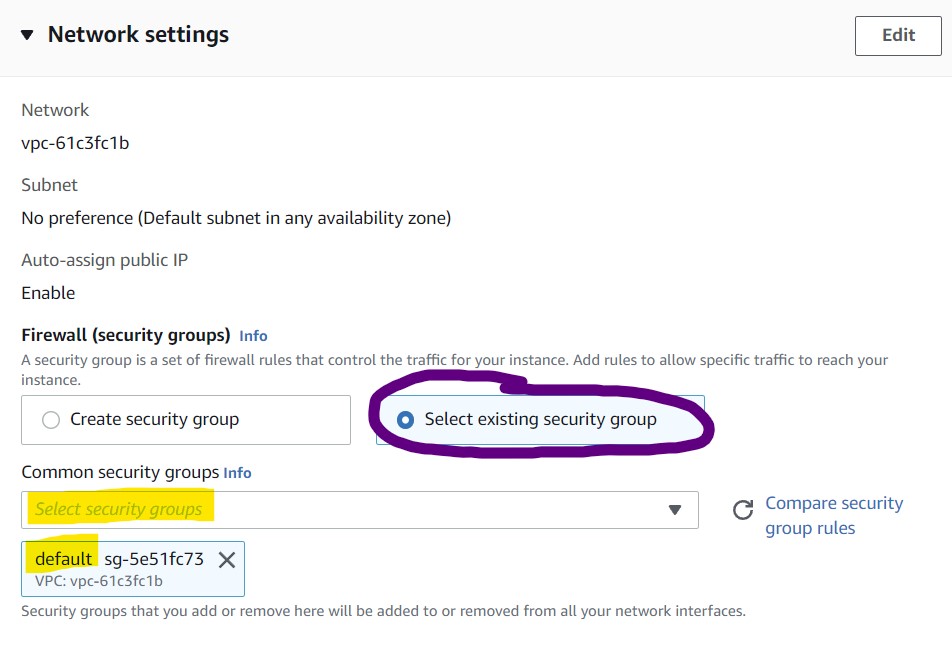
NOTE: This “default” network setting configuration leaves the instance open to public access. Typically you will want to restrict this to only trusted IP addresses, but for the purposes of the workshop we keep this open so there is no need to troubleshoot network issues. To balance this security flaw, we will restrict access to our instances with another instance feature in a few more steps.
8) In the Configure Storage section, set the first field to "30" and leave the second field set to "gp2" so we can have 30GB of storage on our EC2 instance.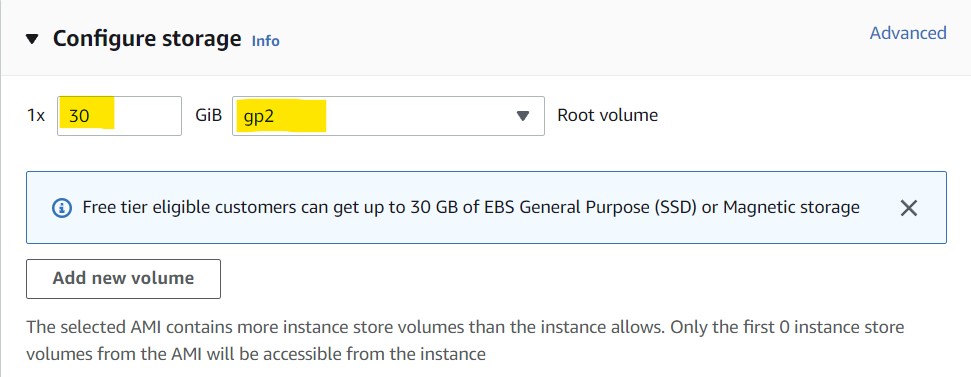
9) Open the Advanced Details panel and set the IAM instance profile to "NCBI-Workshop-particiant-EC2-instance"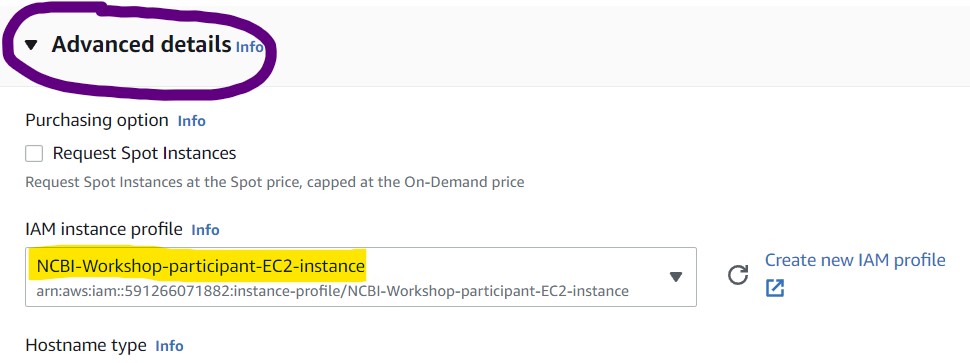
10) Click Launch Instance on the right-hand side of the screen to complete the EC2 instance creation.
11) Click View all instances after the instance launch is complete to see the list of available instances
12) On the Instances page – Find your instance in the table of created instances and look to the Status Check column to see the status of yours.
13) Refresh the page occasionally until the Status Check column changes to 2/2 checks passed for your instance. This means we can now log into the instance.
NOTE: There are several ‘statuses’ this column can have. 2/2 checks passed is the final status. So, if you see anything else in the Status Check column, the instance is not ready to go.

14) Check the box to the left of your instance name (top image) to select the instance, then click Connect in the top right to head to the instance launcher (bottom image)

15) On the launcher page, click Connect in the bottom right. This will launch a new tab in your browser and connect you to your remote computer!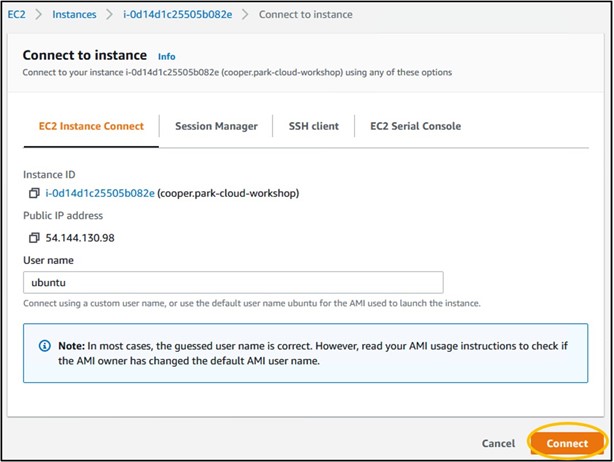
Installing Software
Before we can do our analyses, we need to install some software into our new remote computer
1) First we need to update the pre-installed software in our terminal. Copy/paste the following command into your terminal, then hit Enter
sudo apt-get update
2) To download magicBLAST, copy/paste the following command into your terminal, then hit Enter
curl -o magicblast.tar.gz https://ftp.ncbi.nlm.nih.gov/blast/executables/magicblast/LATEST/
3) We also need to unpack the software so we can run it. Run the following command to do that
tar -xvzf magicblast.tar.gz && chmod -R 755 ncbi-magicblast-1.6.0/
4) Next, we need to install samtools. Run the follow comamnd to do that:
sudo apt install -y samtools
5) Finally, we need to install the AWS command line interface. Run the following commands to do that:
sudo apt install -y unzip && curl -o awscliv2.zip https://awscli.amazonaws.com/awscli-exe-linux-x86_64.zip && unzip awscliv2.zip && sudo ./aws/install
Mapping Reads with MagicBLAST
We can (finally) run MagicBLAST to align some reads! We just need two pieces of information to run the program.
A. The reference sequence – Will be solved with Step 1 below
B. The accession numbers for our reads – Will be solved with Step 2 below
1) Based on the information from the manuscript, we know that the deleted region in the genome is on Chromosome 7. In NCBI, the accession number for this sequence is NC_000007 so we can download this sequence to our remote computer and use it as the reference sequence for our alignment. Download the sequence using the following command.
curl -o chr7.fa 'https://eutils.ncbi.nlm.nih.gov/entrez/eutils/efetch.fcgi?db=nuccore&id=NC_000007&rettype=fasta'
2) Our Athena query gave us three different accession numbers that could be the child’s sequence data. To find out which one is associated with the child, scroll through the columns to find one that distinguishes each accession (hint: it’s the library_name column).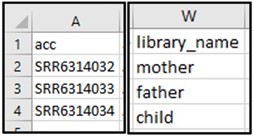
3) It looks like SRR6314034 is the ID we want! To run MagicBLAST on our selected accession ID, run the following command. This should take ~1 minute to run. You’ll know it worked okay if the command runs with NO output.
./ncbi-magicblast-1.6.0/bin/magicblast -subject chr7.fa -sra SRR6314034 -out SRR6314034.sam
4) Next, we need to format the output files so that we can use them in Genome Data Viewer. Run the following samtools commands to do this. it will run each samtools command in order automatically. Like above, if NOTHING happened after hitting enter, then it worked!
samtools view -S -b SRR6314034.sam > SRR6314034.bam && samtools sort SRR6314034.bam -o SRR6314034.sorted.bam && samtools index SRR6314034.sorted.bam SRR6314034.sorted.bam.bai
5) Now we’ll move all these results files to a single folder so we can keep track of them
mkdir results && mv SRR* results/
6) Finally, we need to move these results files to our S3 bucket so we can access them outside of our AWS account. Run the following AWS CLI command to copy the files to your S3 bucket.
REMEMBER: You will need to replace the <username> piece of the command with your own login username to make it match your S3 bucket name. So copy/paste the command into your terminal, then use the arrow keys to move your cursor back through the string and change the name to your own bucket.
aws s3 sync results/ s3://<username>-cloud-workshop
7) To check if we got all of our files moved to our s3 bucket we can run one final command (remember to change the <username> portion again here):
aws s3 ls s3://<username>-cloud-workshop
8) We should now be done with our remote computer (aka: EC2 instance). Go ahead and close the browser tab your instance is open in.
9) In the console webpage, click the blue Instances button at the top of the instance launcher page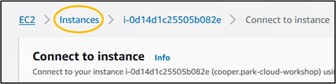
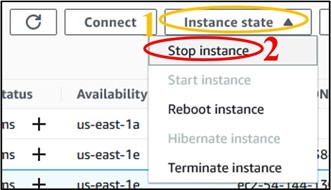
10) We don’t want to leave an instance on while not using it, because it costs money to keep it active. So, let’s shut it down, but not delete it, just in case we want to use it later. Check the box next to your instance (top image) then click the Instance State drop-down menu and select Stop Instance (bottom image).
11) Finally, we need to check on the files in our S3 bucket and make them publicly available to upload the files to GDV later. Navigate back to the S3 page (use the search bar at the top of the console page) (top image) and click on your bucket name (bottom image) to see its contents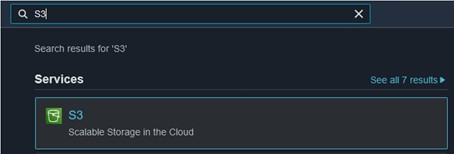

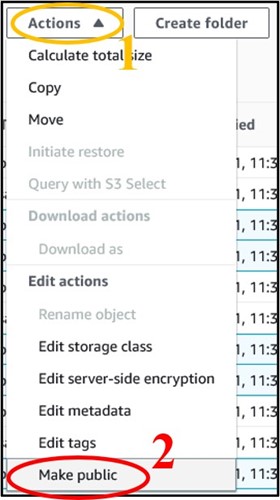
12) You should have four files in your bucket. We need the files that end in sorted.bam and sorted.bam.bai. Check the box next to each of those files (top image) then use the Actions drop-down menu and select Make Public at the very bottom (bottom image)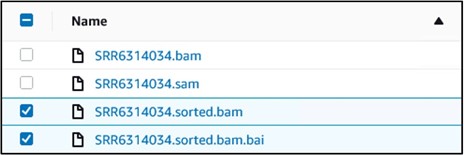
13) On the new page, click the orange Make Public button in the bottom right of the page to make the files publicly accessible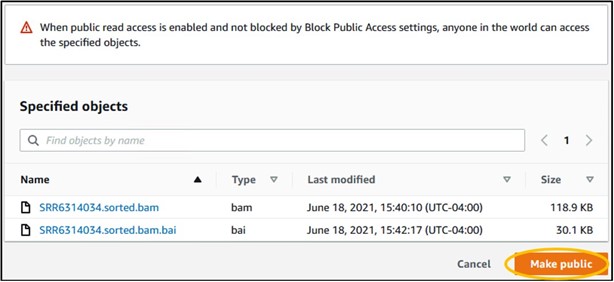
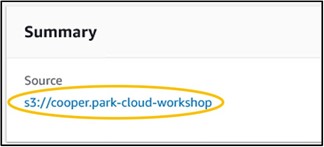
14) If it works, you will see a green banner at the top of the new page like seen below (top image). If you see this, click your bucket link under the “summary” panel (bottom image) to navigate back to the main bucket page.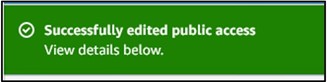
Page 1 of 1
Last Reviewed: July 6, 2022